
In Part 1, I shared our vision and all the design details behind our kitchen remodel. Now for the fun part: the before and afters.
This kitchen has come a long way. When we bought the house, we knew right away that the kitchen needed a full overhaul. It was built in 1980, barely touched since, and while it had solid bones, it just wasn’t functional for a busy family of five. The layout was dated. The appliances were old. The power to half the kitchen literally stopped working. At one point, we had extension cords strung across the counters to keep the dishwasher and disposal running.
We loved the idea of doing the remodel ourselves—but once we imagined two years without a usable kitchen, reality set in. That’s when we brought in Perryman Painting and Remodeling, who we’d already worked with on our home’s exterior. They were amazing to work with again—patient, responsive, and totally respectful of my design brain (which never stops tweaking things mid-process).
Here’s how it all came together.
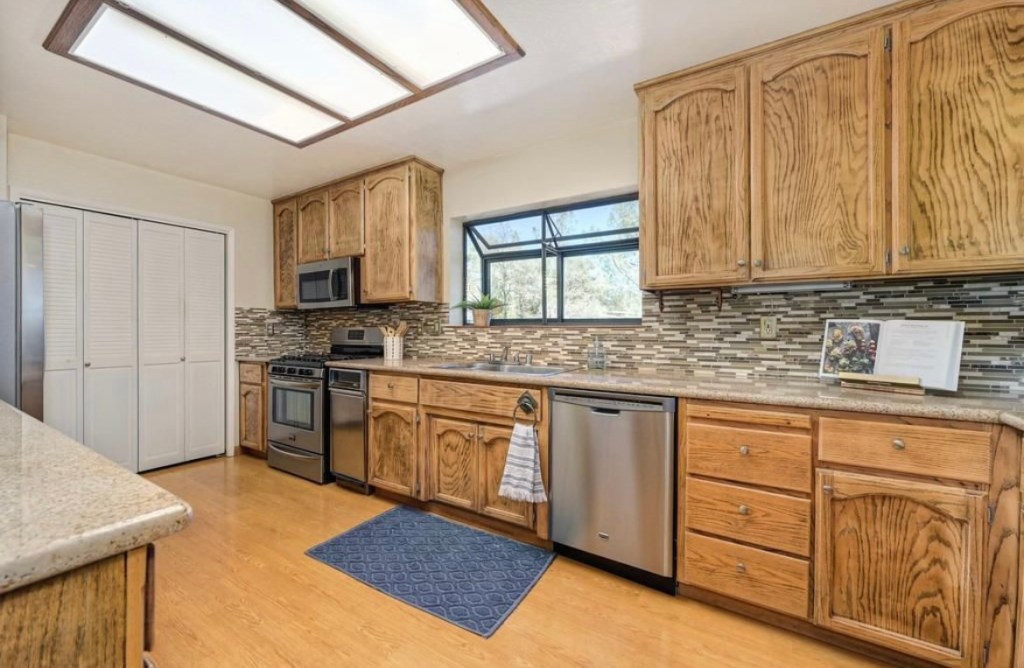
Before: Functional-ish, But Failing
- Builder-grade cabinets with peeling doors
- Overhead lighting that made everything feel yellow
- An awkward peninsula that cut off the flow
- Dated appliances + failing electrical
- Very little natural light


After: Warm, Modern, and Made for Our Life


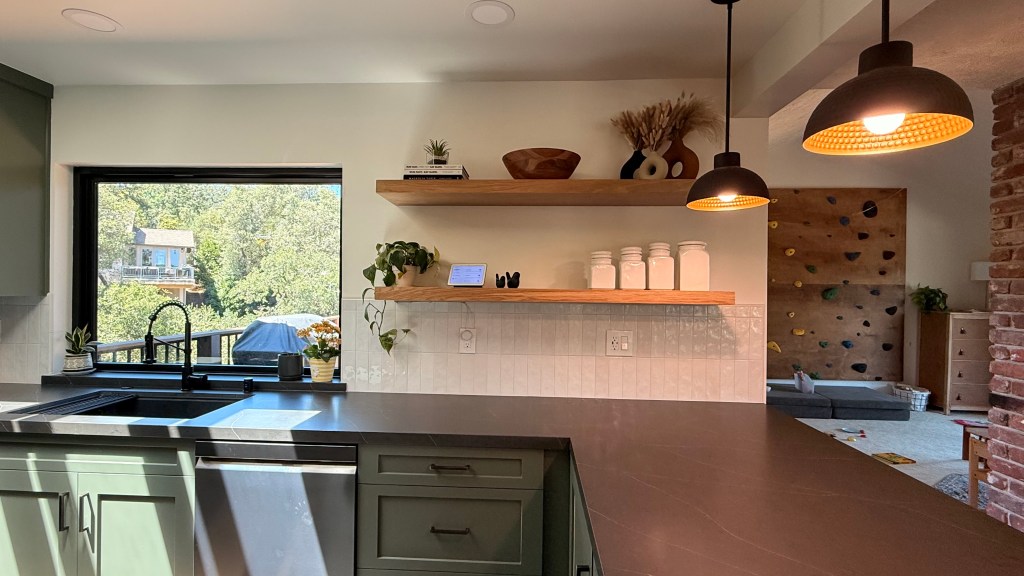
Cabinets: Custom inset shaker style, painted Rosemary Green
Countertops: Broadway Black leathered quartz with a straight edge
Backsplash: Passion Blanco tile, set vertically for subtle texture
Floors: Montauk Black Slate tile—durable and grounding
Walls: Alabaster White (Sherwin-Williams)
Sink & Faucet:
- KRAUS 32” black granite single bowl
- KRAUS Bolden matte black commercial faucet
Hardware & Lighting:
- Oil-rubbed bronze pulls
- Hammered oil-rubbed bronze pendant lights
Appliances: All black stainless steel
- LG induction cooktop
- LG combo wall oven with air fry
- LG QuadWash Pro dishwasher
- LG 4-door fridge with convertible drawer
- Zephyr Core 36” under-cabinet hood
What Changed (and What We Love)
- Flow: We reworked the layout for better traffic patterns and workspace—especially helpful with kids constantly underfoot.
- Lighting: Between the new windows (thanks, California Craftsman!) and better lighting choices, the space now glows naturally.
- Durability: Everything was chosen with real life in mind—gritty hands, sticky counters, constant use.
- Personality: It feels like us. Clean lines, natural textures, just enough contrast to feel modern but grounded.
A Few Real-Life Moments We’ve Already Had in Here
- Dance parties while making dinner with the sunlight shining down through the skylight
- Making chocolate chip cookies with the girls on the bar stools and little dude on his new smaller helper stool.
- Having neighbors over and still participating in the conversations while in the kitchen vs the family room
- Actually wanting to clean up after dinner (okay, sometimes)
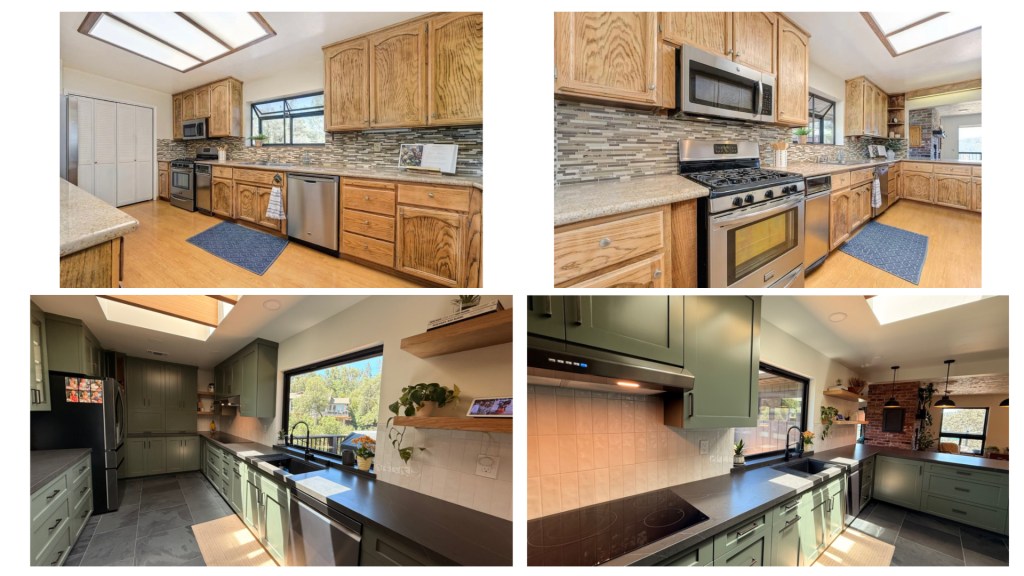
Before & After: Side-by-Side Comparison


Coming Up Next…
I’ll be sharing our bathroom update next, along with a few lessons I’ve learned from being my own designer. Spoiler: you can design your own home—but it helps to have a flexible plan, a great team, and a little grace when things get messy.
